Correct positioning of the workpieces is essential for the success of the production process. The most important things to bear in mind are the following:
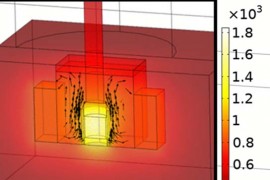
- The concentration of heat must be avoided and it must be possible to dissipate it properly: To this end, it is important to avoid printing completely overlapping layers one on top of the other. This is why parts are usually positioned obliquely to the platform. In addition, semi-enclosed volumes should always have their openings facing upwards.
- Large flat surfaces are warped: Layers with excessively large interconnected surfaces should be avoided. In general, it is not advisable to print surfaces larger than 12 cm2 or larger than 6 cm along one of the axes on a single layer.
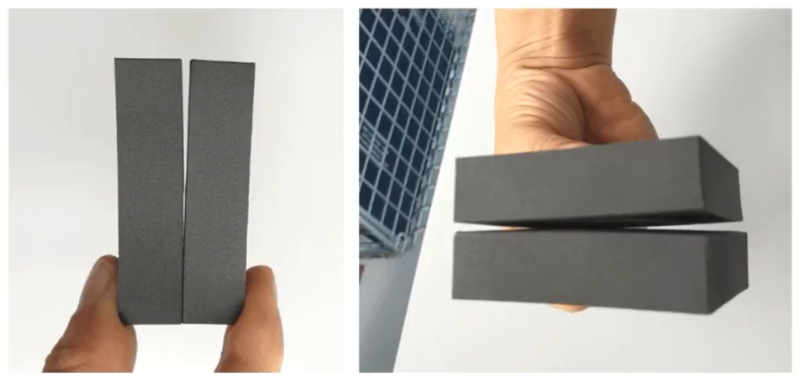
Image 1: Example of a part with warping due to poor positioning. Source: Own elaboration.
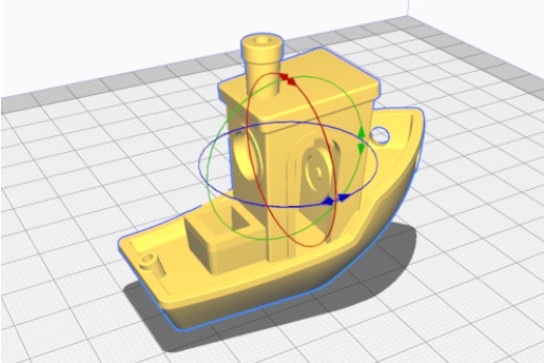
- Layers must be homogeneous: The printed area in each layer must be similar, avoiding abrupt changes from one layer to the next. Lack of homogeneity often leads to marks and aesthetic defects on the parts.
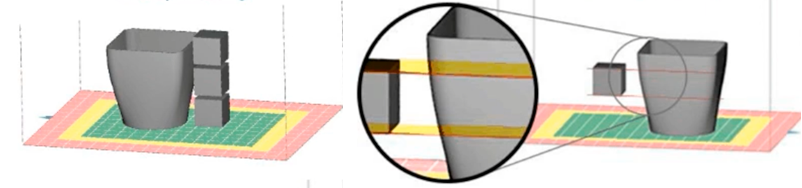
Image 2: Positioning for homogeneous (left) and non-homogeneous (right) production. Source: Sinterit: Sinterit
- Large solid volumes have a high risk of failure: Large volume parts, where it is not possible to shift the layers to avoid heat concentration, should be hollowed out or printed with a filler pattern.
Positioning tips
- Flat surfaces: It is advisable to position them at 45º in all axes to avoid deformation or heat build-up
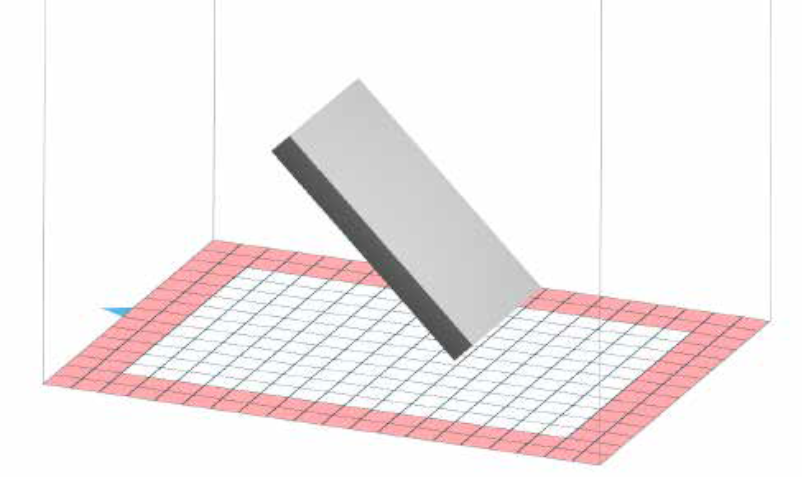
Image 3: Example of correct positioning of a workpiece with large flat surfaces. Source: Sinterit
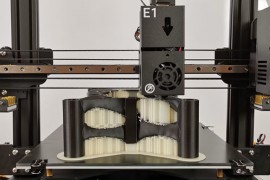
- Solid blocks: Like flat surfaces, they should be positioned at 45° in all axes. There is the exception of hollow prisms with little wall thickness, whose optimum positioning is vertical, as this allows heat dissipation from the sides. In the case of large prisms, it is advisable to hollow out the part.
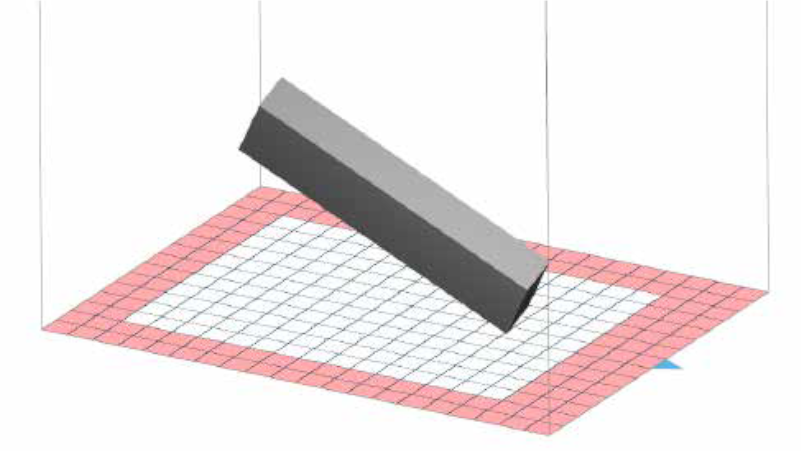
Image 4: Example of correct positioning of a prism. Source: Sinterit
- Semi-open volumes or boxes: Their positioning is governed by the above rules, however, the opening should always be oriented towards the top.
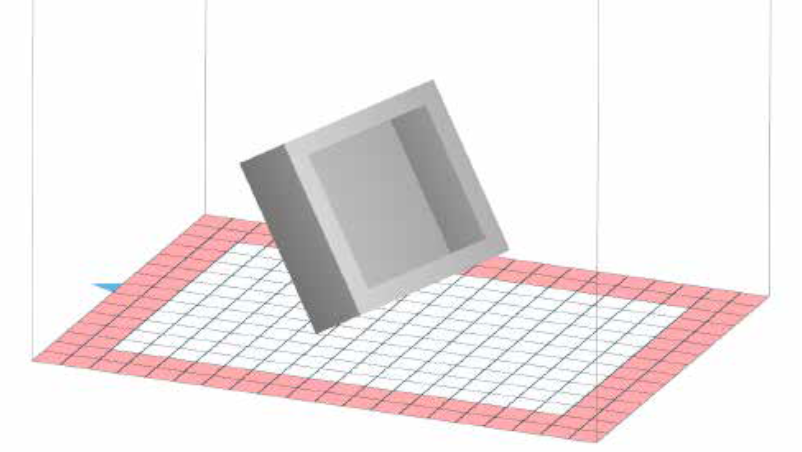
Image 5: Example of correct positioning of a box. Source: Sinterit
- Details with smooth surfaces and sharp edges: Smooth surfaces or details, such as spheres or rounded elements, should be positioned towards the bottom for better quality, while details with edges that need to be sharp should be oriented towards the top. Generally, bottom-facing faces will show softer details, while top-facing faces will show sharper details.
- Openings, channels and holes: Whenever possible they should be oriented parallel to the Z-axis for best quality.
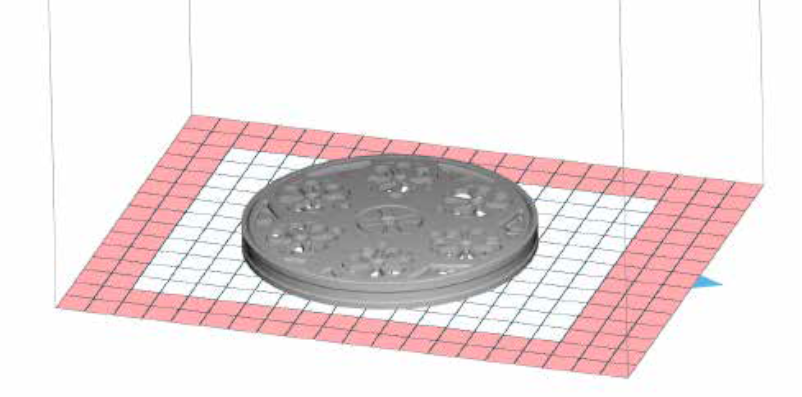
Image 6: Example of correct positioning of a part with holes and channels. Source: Sinterit
- Moving parts: In SLS 3D printing, maximum precision is always obtained in the XY plane, so whenever possible, they should always be oriented in this way.
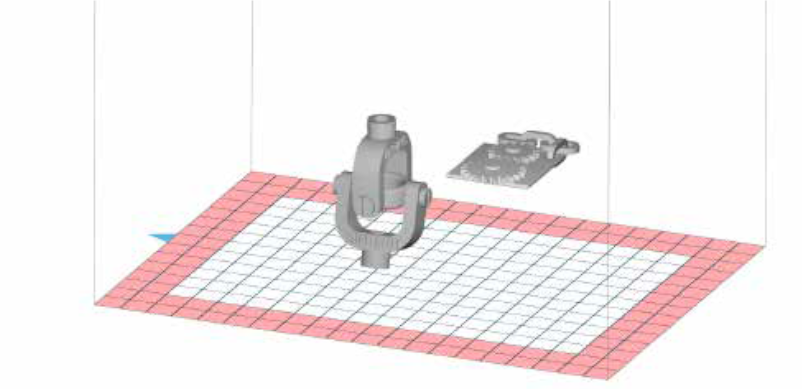
Image 7: Example of correct positioning of moving parts. Source: Sinterit
These tips help to reduce the risk of failure, however they are based on generic situations. Furthermore, there is no single correct positioning, but within low risk positioning, some will give higher quality and some will give shorter print times. This is why many factors derived from experience must be taken into account when positioning a part.
This guide discusses concepts in a general way and does not focus on a particular brand or model, although they may be mentioned at some point. There may be important differences in calibration or adjustment procedures between different makes and models, so it is recommended that the manufacturer's manual be consulted before reading this guide.