One of the major limitations of FFF 3D printing technology is the need to print each layer on top of the previous one, without the possibility of producing bridges, cantilevers or walls with large slopes.
To overcome this, it is common to use printed support structures that serve as a support base for the previous elements. These structures are known as supports.
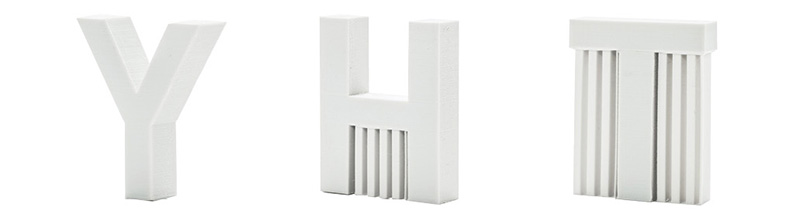
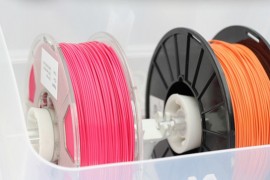
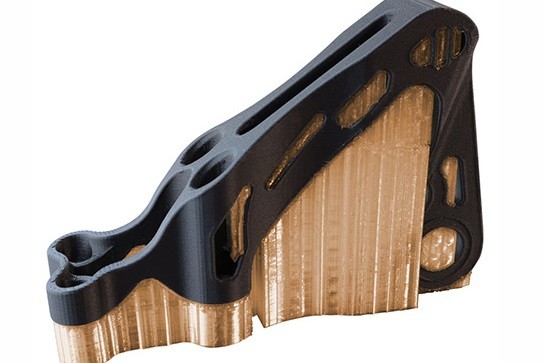
Image 1: Supports on 3D printed parts. Source: 3DHubs
Parts of the supports
The brackets mainly consist of four parts:
-
Support: This is the structure that supports the cantilevered layers.
-
Dense support: The last layers of the support in contact with the piece are called dense support. Its name is due to the fact that these layers have a higher density than the rest of the support. This is an optional parameter that improves the support of the part by providing a larger contact surface, without significantly increasing the material cost.
-
Horizontal separation: This is the space between the side walls of the support and those of the part. It prevents the workpiece from adhering laterally to the supports.
-
Vertical gap: This is the space between the top face of the support and the workpiece.
Types of supports
Depending on the material in which they are made, supports can be classified as soluble and non-soluble. In the case of printers with a single extruder, the supports must always be produced in the same material as the part. In the case of dual extruders, the supports can be produced in a different material than the part material. In these cases, it is common to use a solvent-soluble material in which the part does not solubilise (see post soluble filaments for support).
Media configuration parameters
The use of soluble or non-soluble material will condition the configuration of the substrates, so it is very important to know the different parameters and how they affect the behaviour of the substrates.
Each laminating software may include its own parameters that are not available in other programs, so it is advisable to consult the manual of the software being used. However, there are a series of parameters that are common to all of them and that allow any type of support to be configured:
-
Support threshold or cantilever: This is the maximum wall angle from which supports will be generated. Values between 30 and 60 are generally used. Small layer heights allow higher slopes to be printed without supports, while large layer heights may require supports even with small slopes.
-
Infill Type/Pattern: The infill is configured as a low density structure. The patterns that can be selected are similar to those used in the infill of the part. Unidirectional (lines) will be quicker and easier to remove, although they may be less stable in tall parts, while bidirectional (grids) provide greater stability but may be more difficult to remove, especially in small holes.
-
Density of the support: This is the ratio between empty space and material in the supports. A higher density produces more stable supports, but at the cost of a higher material cost and difficulty to remove them. Values below 30% are usually used.
-
Number of layers of dense support: This is the number of layers in contact with the piece and which will have a higher density than the rest of the support. It is advisable to use at least 3.
-
Dense support density: This is the density of the last layers of support in contact with the part. Values higher than 30% are generally used for non-soluble substrates and higher than 80% for soluble substrates.
-
Vertical separation: This is the distance between the last layer of the support and the first layer of the part. Generally, the equivalent of one layer is used when non-soluble supports are used and zero when soluble supports are used.
In the case of dual extruder printers, it is possible to select different extruders for the substrate and for the dense substrate. This is a great help to save soluble material (usually at a higher cost) and time when solubilising the substrates. It is therefore advisable to select the same extruder that prints the part for the support, and the extruder with soluble material only for the dense support. In this way, when this interface is dissolved, the rest of the support is easily detached from the part without the need to dissolve it. With this configuration, it is recommended to use at least 5 layers of dense support with a separation equal to zero.
Common problems with soluble supports
Soluble materials, and especially water-soluble materials, are often more difficult to print. Some of the common problems are:
-
Moisture: This concerns only water-soluble materials. Such materials are particularly sensitive to humidity, so they must be stored under suitable conditions. In addition, it is advisable to use airtight boxes or desiccants during printing, as they can hydrate within a few hours. The most common consequence of a wet support filament is clogging in the hotend.
-
Poor adhesion: It is very important to select a compatible support material, not only in terms of temperature but also in terms of adhesion. When printing a cantilever, the support serves as a base, so poor adhesion will cause a failure with similar consequences to those caused by adhesion problems in the printing base. In the case of water-soluble filaments, humidity also causes a loss of adhesion of the material, which is particularly common with PVA.
-
Jams: As mentioned above, one of the main consequences of a wet filament backing is jams, but it is not the only cause. Keeping the hotend at high temperatures without printing for a long time can also cause jams. Therefore, when extruder changes are not frequent, it is advisable to reduce the temperature of the inactive extruder by 30 °C.