When designing and preparing parts for 3D printing it is very important to take into account the resolution limit of our equipment. It is advisable to avoid elements with a smaller size, as the printing quality of these elements will be very low and in many cases, the laminating software itself will omit them.
How to know the resolution limit of an FDM 3D printer
All FDM printers have two resolutions: one for X and Y and one for Z. The X and Y resolution is directly dependent on the nozzle used, however it does not correspond exactly to the nozzle diameter, but to the extrusion width.
For example, a 0.4 mm nozzle generally produces an extrusion width of 0.48 mm, so the resolution in the X and Y axes would be 0.48 mm.
Smaller nozzles will increase the print resolution, while larger nozzles will reduce it. For example, a 0.25 mm nozzle will achieve a resolution of 0.3 mm while a 0.6 mm nozzle will achieve a resolution of 0.72 mm.
The actual extrusion width of a printer should be determined practically by measuring the thickness of a printed perimeter with a caliper, however, for a correctly calibrated printer it will be approximately 20 % larger than the nozzle diameter.
The resolution on the Y-axis coincides with the layer height, so it can be varied during the lamination setup.
When talking about small details, two types are to be distinguished: thin walls and small details.
Thin walls are those with a thickness smaller than the extrusion width, and therefore cannot be printed with a simple extrusion.
Small details are those which, despite being above the resolution of the printer, are problematic when it comes to closing perimeters or cooling, due to their small size.
How to set up thin wall printing during lamination
It should be noted that by default, all laminating software will omit in the gcode any walls with a thickness less than the printer's resolution, so the printer will not print them at all.
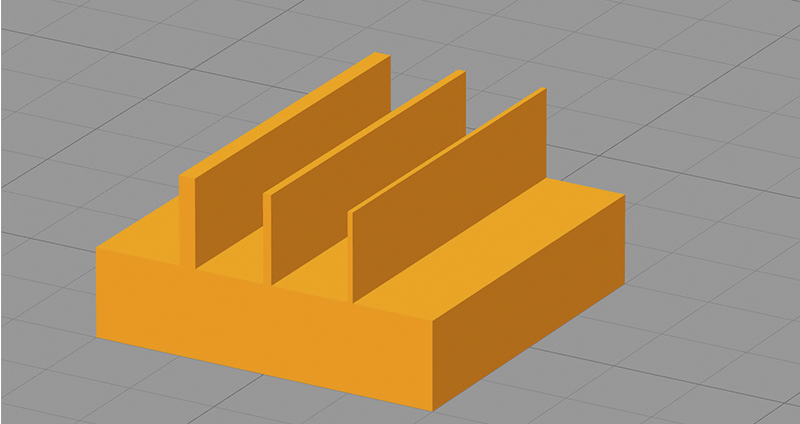
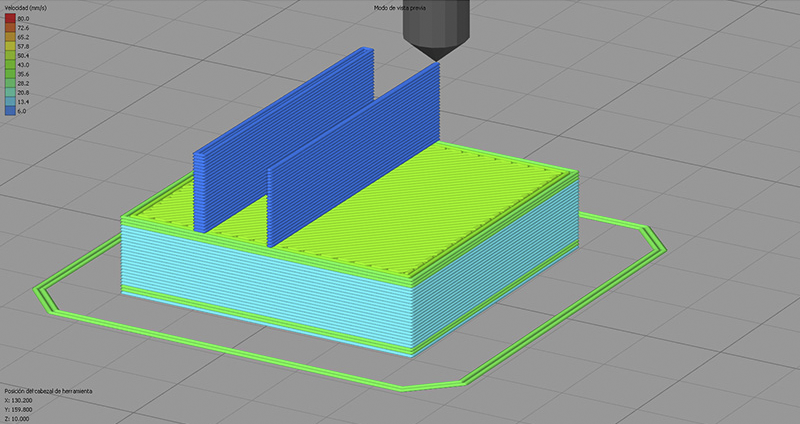
Image 1: Part with a wall thickness below the resolution of the printer, before and after lamination. Source: own elaboration.
However, there is a solution to prevent the software from omitting these walls and trying to print them. Most laminators have a parameter that allows you to set the minimum extrusion width. When this parameter is set to a value less than the extrusion width, the software will take this value as the minimum resolution and try to print any wall size between this value and the extrusion width. To do this, it will adjust the extrusion flow proportionally.
It should be noted that setting low values for this parameter carries risks. Printing at extrusion flow rates lower than optimum can lead to extrusion inconsistency, a significant loss of accuracy and even printing failure. In addition, if the wall height is high, there is a risk of buckling. It is advisable to carry out tests to determine the minimum value that can be safely set. It is also important to work with low print speeds.
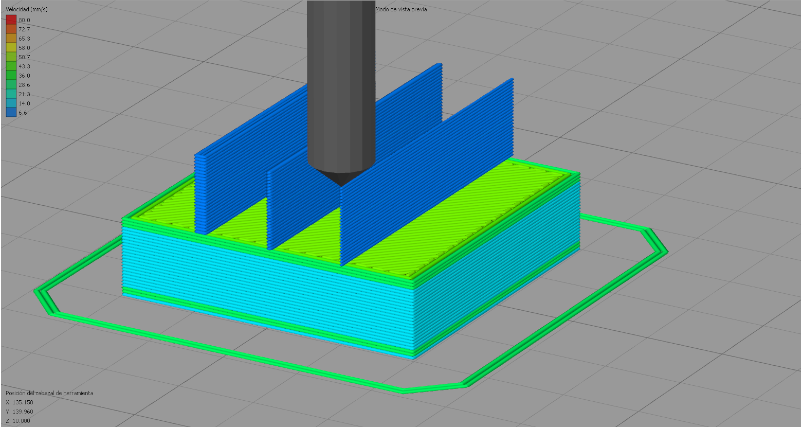
Image 2: Walls of 0.92 mm, 0.48 mm and 0.30 mm after lamination. Source: own elaboration.
How to set up the printing of small details during lamination.
In contrast to thin walls, the default lamination software will not omit the printing of small details.
This can be problematic, as it is these elements that present the greatest risk of failure.
To minimise the risk of failure it is very important to print these elements at very low speeds and in the case of materials such as PLA or PETg to use the layer fan to its maximum.
As far as the configuration of small details is concerned, each software treats them differently. The only common parameter that affects this type of elements is the speed reduction for layers with a very low printing time (15 - 45 s). It is recommended to always activate it with a threshold of approximately 30 s for ABS/ASA and 15 s for PLA and PETg.
Simplify3D allows you to set a minimum extrusion length for simple extrusions, so any small details that require extrusion lengths less than this value will be omitted from the laminate.
Ideamaker, unlike other laminators, has a specific section for small details. This function allows you to assign a minimum diameter for details and holes, and apply a speed reduction for them.
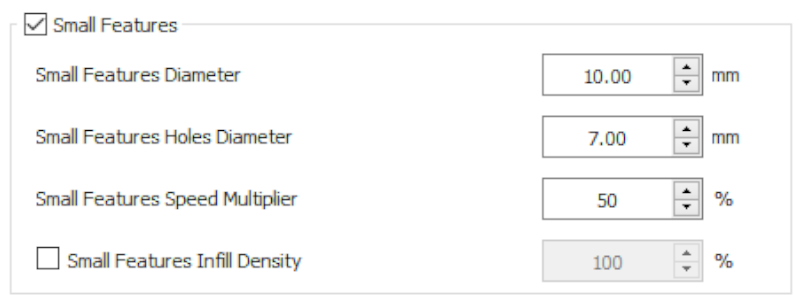
Image 3: Small details configuration section in ideamaker. Source: Raise3D.com
Final considerations
When making a design for FDM printing, it is necessary to know the maximum resolution of the 3D printer with which it will be manufactured and try to avoid elements with dimensions close to this resolution limit.
In case small details or thin walls need to be printed, the following tips should be taken into account:
- Check the thin-wall configuration of the laminator, as well as the small details function if available. Improper settings will cause them to be omitted from the laminate and therefore not printed on the final part.
- Use a low printing speed. If the laminator used allows to reduce the speed only for small details, this function shall be selected, as it avoids an excessive increase of the printing time. If this function is not available, it is necessary to reduce the overall printing speed. The reduction will depend on the type of printer, the material used, the printing temperature and the efficiency of the layer fan and must therefore be determined independently for each individual case.
- Cool the workpiece as quickly as possible to avoid significant deformation of the layers.
It should be noted, however, that working below the optimum resolution of the printer means a considerable loss of quality and a risk of part failure.