One of the most important parts of the FDM 3D printing process is the adhesion to the manufacturing base. This adhesion must be sufficient at the start of the printing process, the first layers and during the printing process to avoid warping, but once the printing process is finished, it must be possible to remove the part easily.
Depending on the material and the characteristics of the 3D printer used, the adhesion to the base may fail and, with it, the printing of the desired parts.
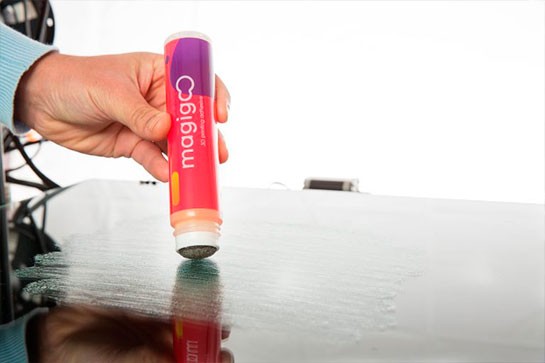
There are various adhesion products available, but the most common ones are spray adhesives, vaporisers or liquid adhesives. Spray adhesives can sometimes leave traces of fixative on fans and other components, which can eventually affect the performance of the 3D printer and lead to failures in the printing process. Using liquid adhesives such as Magigoo, which has a handy applicator, makes application easier and improves adhesion results.
Magigoo has a wide range of products developed for use in combination with different FDM 3D printing materials. Among them we can find Magigoo Original (suitable for basic materials such as PLA, ABS or PETG), Magigoo PP, Magigoo PPGF, Magigoo PC, Magigoo PA, Magigoo Flex (developed for flexible materials), Magigoo HT (for high temperature materials), or Magigoo Pro Metal (oriented to BASF metal filament 3D printing).
In this article you can find some of the most common problems that users may encounter when using these adhesives:
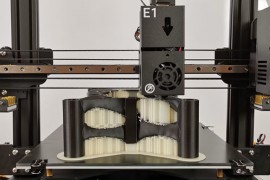
Warping effect persists
There are several reasons why this may happen:
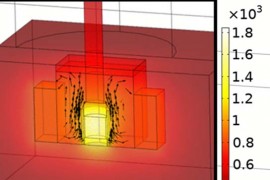
- Use of incorrect parameters. Magigoo has an optimum temperature range where it offers the best adhesive performance.
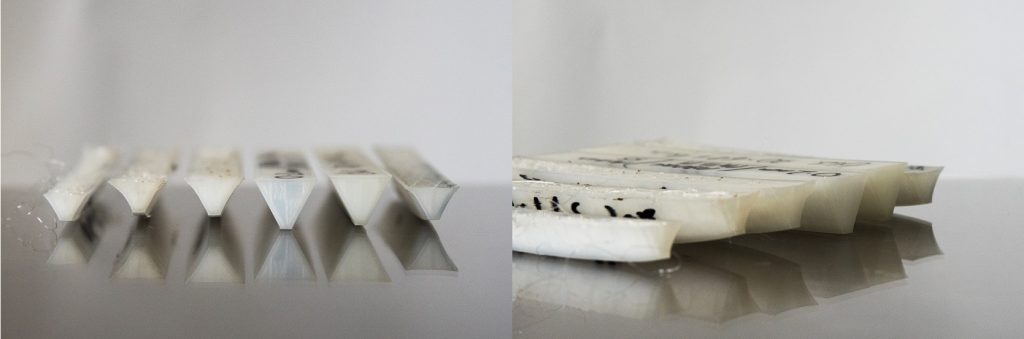
Image 1: 3D printed parts made of the same material deform to different extents when using different bed temperatures. Source: Magigoo.
- Do not use brim. Some materials require brim to be used in combination with optimum settings for optimum results.
- Incorrect height of the first layer. If the nozzle is too far away or too close to the printing base, the adhesion of the material will not be adequate.
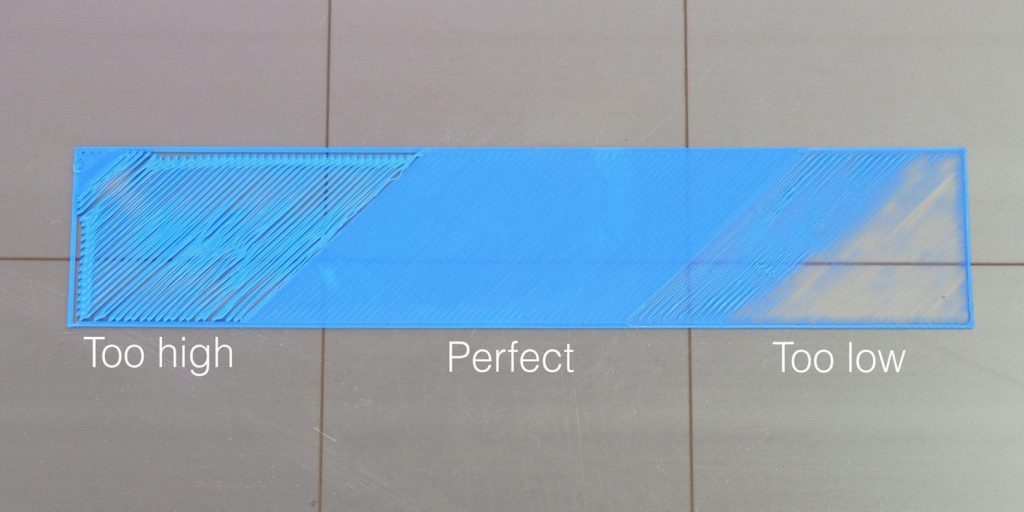
Figure 1: Examples of different first layer heights. Source: Magigoo.
- Incorrect use of the coating fan. Some materials require the use of the layer fan, such as PLA or PETG. However, when using other materials it should be kept off during 3D printing.
- First layer speed too high. Some materials such as ASA, PC and PP need time to interact with the adhesive on the printing plate, so using print speeds that are too high can lead to poor adhesion of the first layer. As a rule of thumb it is recommended to use a speed of 20 mm/s or less for the first layer.
The part is too glued to the base and cannot be removed.
This may be due to a number of reasons:
- Printing too close to the base or with a very high material flow in the first layer can cause excess adhesion that will make part removal very difficult.
- Some materials such as TPU, TPE, PPGF, some PLA or some Nylon often offer resistance when removing parts even after cooling. In these cases there are several methods that can be used to safely remove a printed part that is too stuck to the substrate:
- Make sure that the build plate has cooled completely before attempting to remove it. A spatula can be used if the part is partially detached. In some cases, gently tapping the sides of the part may help to free it.
- If the part cannot be removed even after the base has cooled down completely, it is possible to wet the area around the part with water or to submerge the entire printing plate under water. If the part has a brim, it is recommended to remove the brim first. The part should be easy to remove after 10 minutes. If this is not the case, a spatula can be carefully slid under the part to introduce water into the areas that are still stuck or the part can be immersed for a longer period of time. This method is very useful for removing delicate parts made of flexible or soft materials.
- Parts 3D printed with PPGF react differently to base materials. To facilitate part removal, it is recommended that the 3D printer is turned back on and the build plate is heated to a temperature of 70-90°C and the part is removed when the build plate is hot.
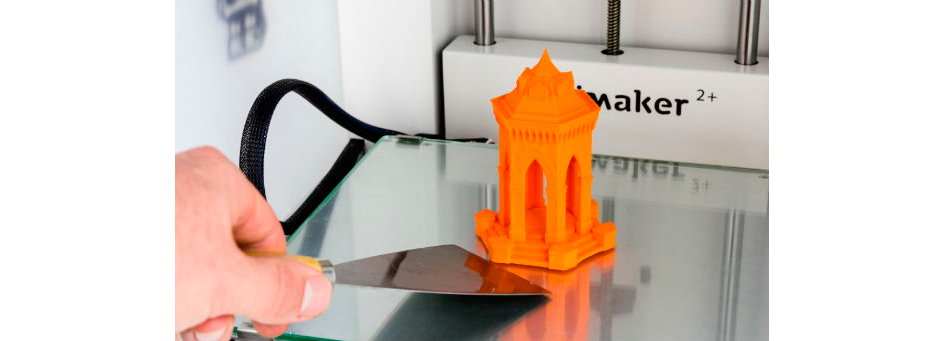
Image 3: Removal of 3D printed part with spatula. Source: Magigoo.
Failure to apply Magigoo, adhesive does not flow
Magigoo has a spring-loaded valve in the applicator, which means that when applying Magigoo you have to press the applicator against the impression base to activate it and release the adhesive material. It should be noted that the valve seal has to be broken when Magigoo is first used, which may require a little extra force the first time.

Image 4: How to press the Magigoo tip to activate the applicator valve. Source: Magigoo.
It should also be noted that after long periods of inactivity or if the product does not seal properly, residual adhesive left on the foam tip after use can solidify and clog the nozzle. This can be easily unclogged by wetting the foam tip with a little water.
Under no circumstances should the sides of the bottle be pressed hard, as the applicator may come off, causing the entire contents of the product to spill out.
Image 5: Do not squeeze the sides of the container tightly. Source: Magigoo.
Can the same adhesive layer be reused for several prints?
For best printing results and reliability when 3D printing, it is always recommended to re-apply Magigoo before each print, especially when using high performance materials such as PC, ASA, PEEK and reinforced Nylons.
Pre-application prior to each print ensures the best results and helps to avoid failed 3D prints related to the adhesion of the first layer.
Magigoo applicator damaged
In some cases, the foam application tip may wear out or break. It should be noted that the lifetime of the foam tip is considerably reduced if you apply Magigoo on a substrate that is above 40 °C.
The lifetime of the foam tip is also reduced if the foam is dirty or if glue is left to dry on the foam tip.
How Magigoo should be stored
It is recommended to store the product in an upright position in a cool, dark place. The screw cap should be tightly closed when not in use and the applicator should be kept clean, free of any glue residue or dust.
This will extend the shelf life of the product and ensure optimum application.
Cleaning prior to Magigoo application
It is recommended to make sure that the build plate is free of dust, residues, previous adhesion products and oils. Cleaning with water should be sufficient, but if water is not sufficient, it is recommended to use an FDM 3D printer cleaner.
Video 1: How to use Magigoo. Source: Magigoo.
With these recommendations, many of the problems that arise when using an adhesive such as Magigoo on FDM 3D printers can be solved.